How to Manage DNS
Once you’ve verified that you’re using our Name Server
Records, you can manage
your DNS either in your Account Manager or Hosting Manager. Once
you add or update DNS Records via one of these platforms, all other future DNS
management should be done in the same place. Below are the steps on how you can
manage your DNS.
VODIEN.COM
If you opt to manage your DNS Records via your Account Manager, please
follow the steps below:
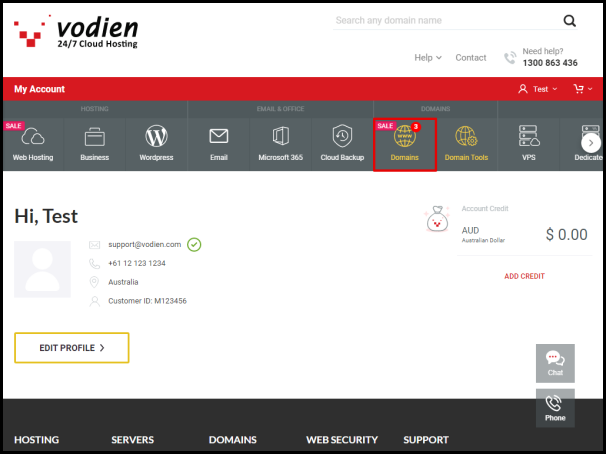
Step 2. Click
Domains
on the menu bar at the top of the page.
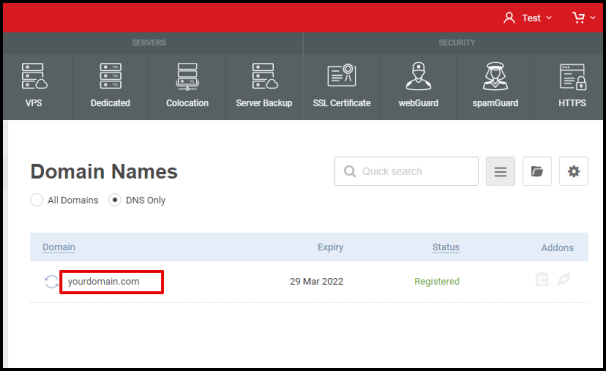
Step 3. Click the
domain name
you wish to manage.
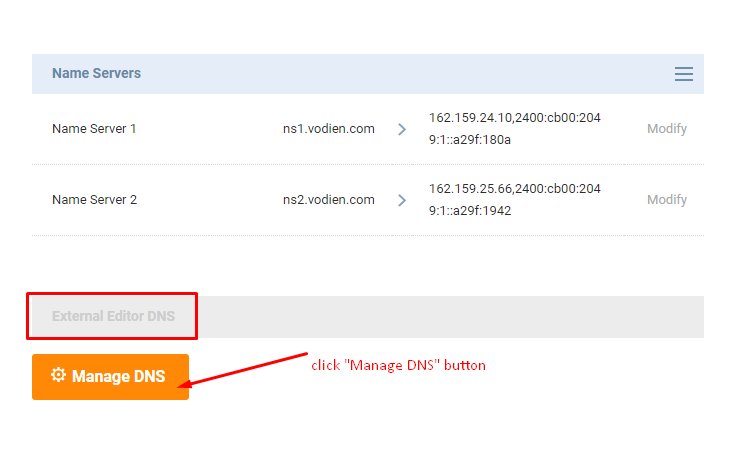
Step 4. Scroll down to the External Editor DNS section, then
click the
Manage DNS
button.
(Make sure to allow pop-ups for the Vodien website.)
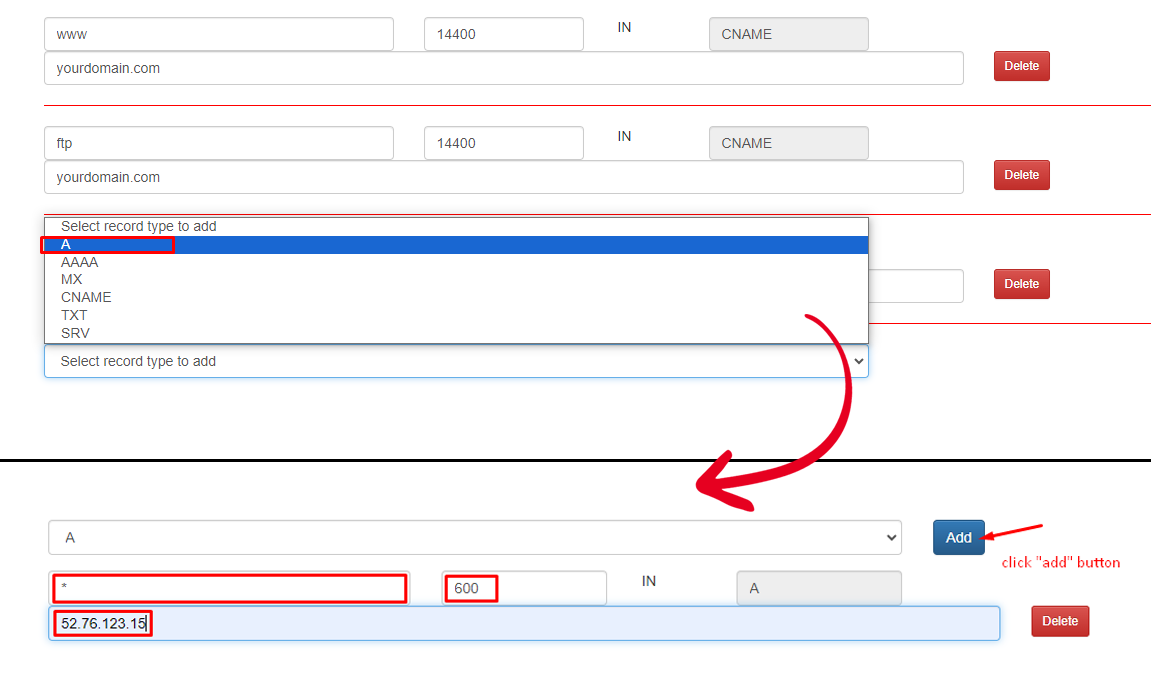
Step 5. To update an existing record, scroll through the list
to look for the record that you wish to update,
then replace the current values.
Or, add a new record: Scroll down to
the bottom of the page, click the
Select record type and
add
option, select the record type, then click the
Add button
and enter the values required.
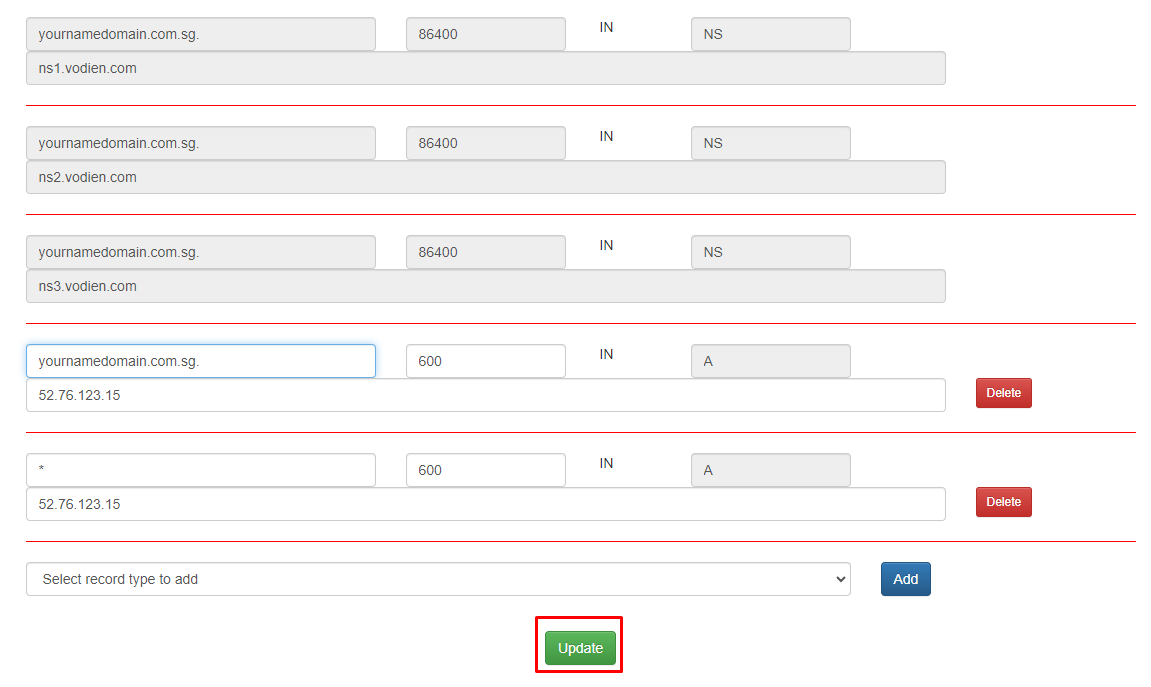
Step 6. Once done, click the
Update
button at the bottom.
Congratulations! You’ve successfully managed your DNS Records via
Account Manager.
| NOTE: Please allow 2 – 4 hours propagation
time after adding the
DNS Records for the whole internet to cache the correct
information. This applies to
changes done on both the Account Manager.
|

